How to test your API with Hoppscotch
In this article, I will show you how to interact with APIs by making requests while showing you some of the cool features of Hoppscotch.
This article is sponsored by Aviyel 🎉. Aviyel works with open source creators to build and incentivise active communities, achieve financial independence and increase adoption of their projects.
Introduction to Hoppscotch
Hoppscotch is an online open-source API request builder built by Liyas Thomas and contributors that helps you create requests faster, saving precious time on development. It is lightweight, effective, and efficient.
Hoppscotch is a totally free open-source project.
Hoppscotch has a low processing demand because it can run simply on the browser.
Hoppscotch is supported by a wide range of browsers and devices, plus it can be installed as a PWA (Progressive Web App), making it even accessible.
Hoppscotch offers multiple features though, in this article, we shall focus on using it as a testing tool for APIs.
What is an API?
API is the acronym for Application Programming Interface, a software intermediary that allows two applications to talk to each other. It is often a set of functions that allows applications to access data and interact with external software components, operating systems, or microservices.
A great analog used to describe APIs and what they do is a restaurant. In this analogy, the following roles are assigned:
API: acts as the waiter that serves you.
Order: acts as the API Request, where data to be fetched or action to be triggered is specified.
Chef: acts as whatever external component you are trying to interact with, also provides the API.
Meal: data gotten from the external component.
When you step into a restaurant, you inform the waiter (API) of your order (API request), and the waiter communicates your order to the Chef (external component). After a hopefully short period of time, the waiter returns with your meal (Data).
The same way a chef provides you with a waiter is the same way companies provide you with an API to communicate how you want to use their services & the data you need from them.
Now that you have a good idea of what APIs are and what they do, let’s dive into the basics of API using Hoppscotch.
Introduction to API Basics
APIs are interacted with by making API requests. Hoppscotch lets you make requests using common HTTP methods just like one would in code. These methods can be use to carry out all possible CRUD (create, retrieve, update, delete) operations.
We are going to use the {JSON} Placeholder free fake API which can be used for testing and prototyping. This will enable us carry out all CRUD operations.
First off, head over to Hoppscotch and place this JSON placeholder request url for posts (https://jsonplaceholder.typicode.com/posts) in the URL field as shown below.
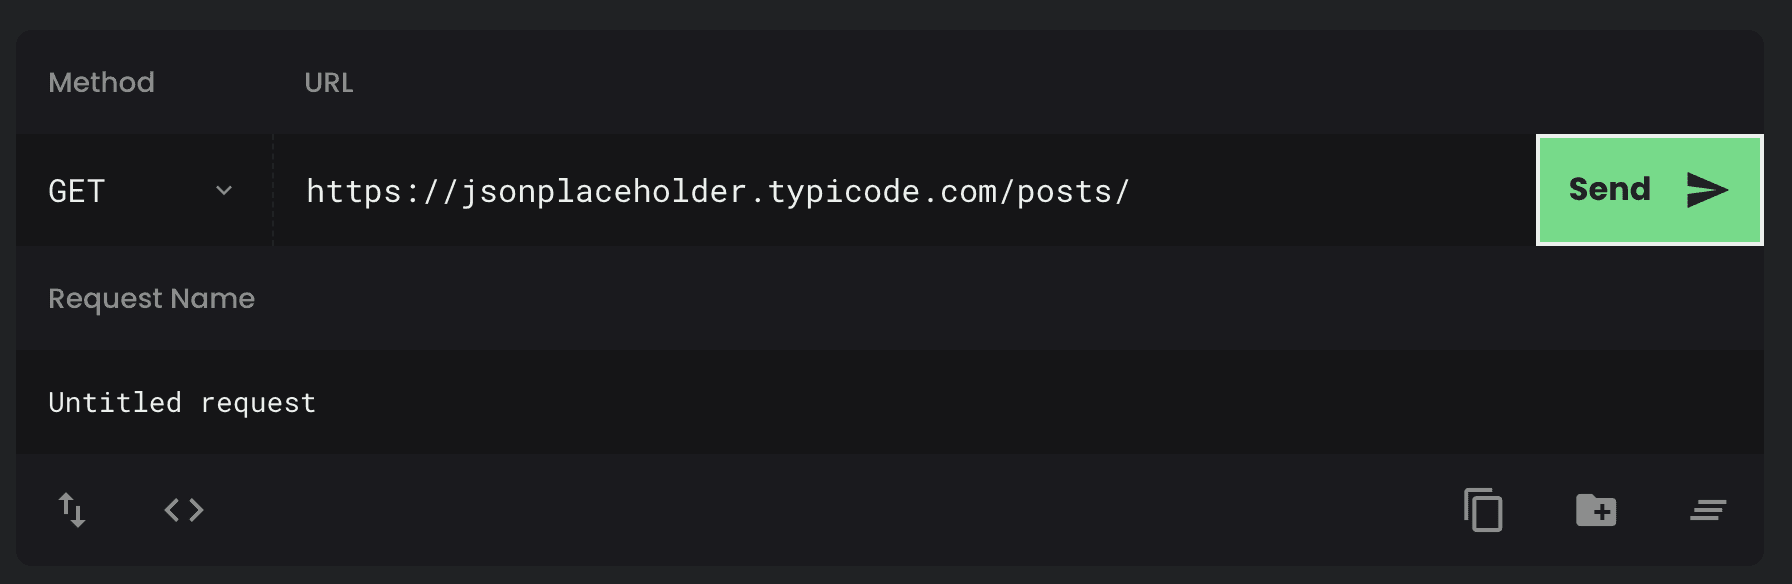
In this article, we shall explore the GET, POST, PUT & DELETE Methods. These are common methods and are enough to get you started with any API out there.
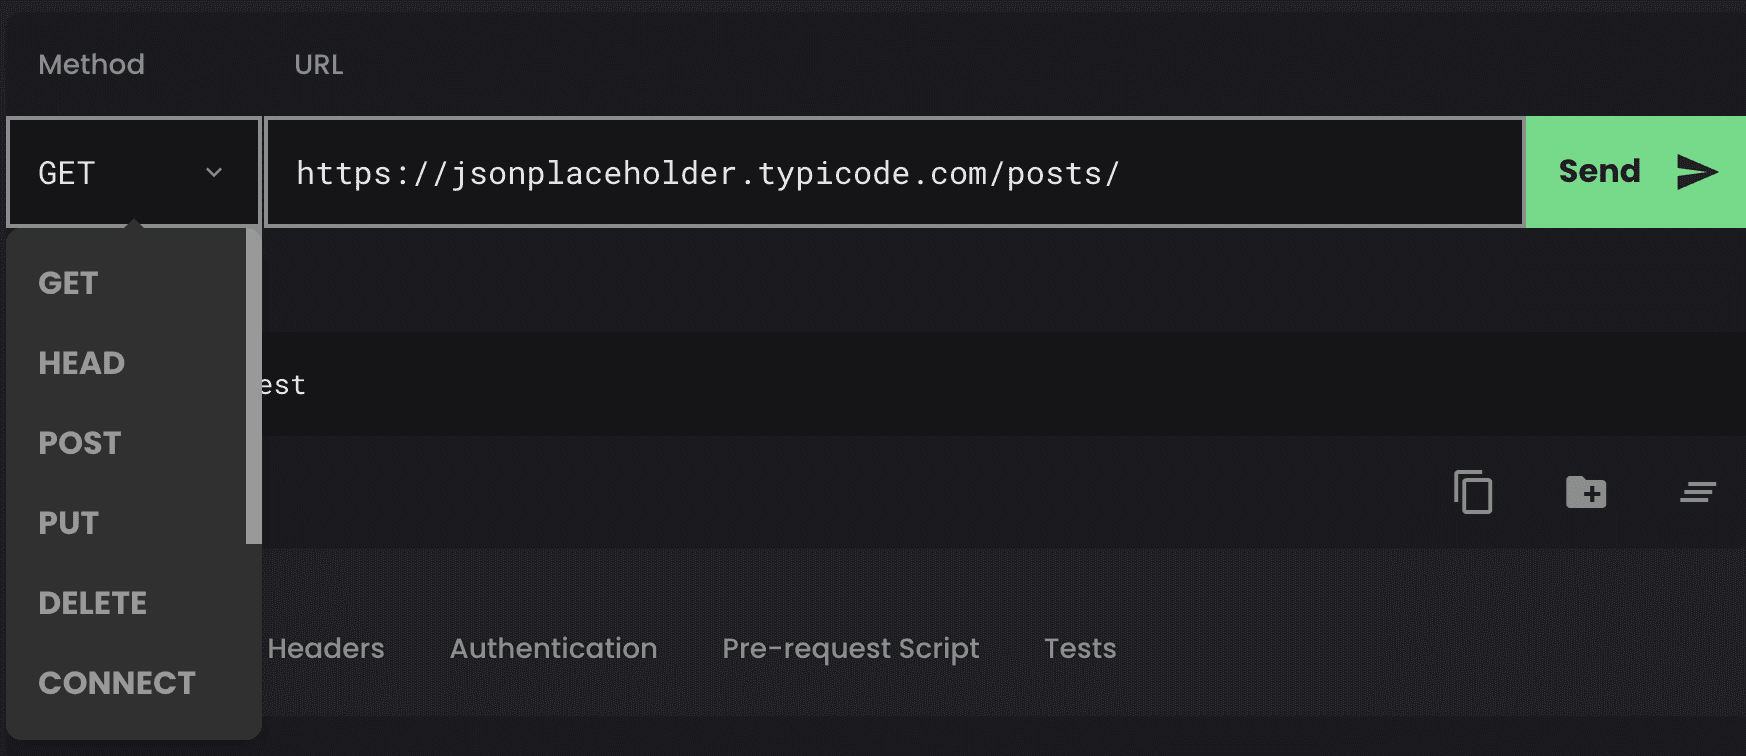
You can access the METHODS using the method dropdown on the top-left shown below
Now that you are all set, we can begin exploring and testing out our API.
GET Method
The GET method used to retrieve whatever information is at the endpoint of a specified request url. GET requests should only be used to retrieve data ****and not to modify it in any way.
Using Hoppscotch, we can make a GET request with ease by setting the method type to GET and clicking the send button on the right.
Now you can check out the response in the response body. Isn’t that so cool? Don’t try to make sense of the response. It’s just dummy data 🥴
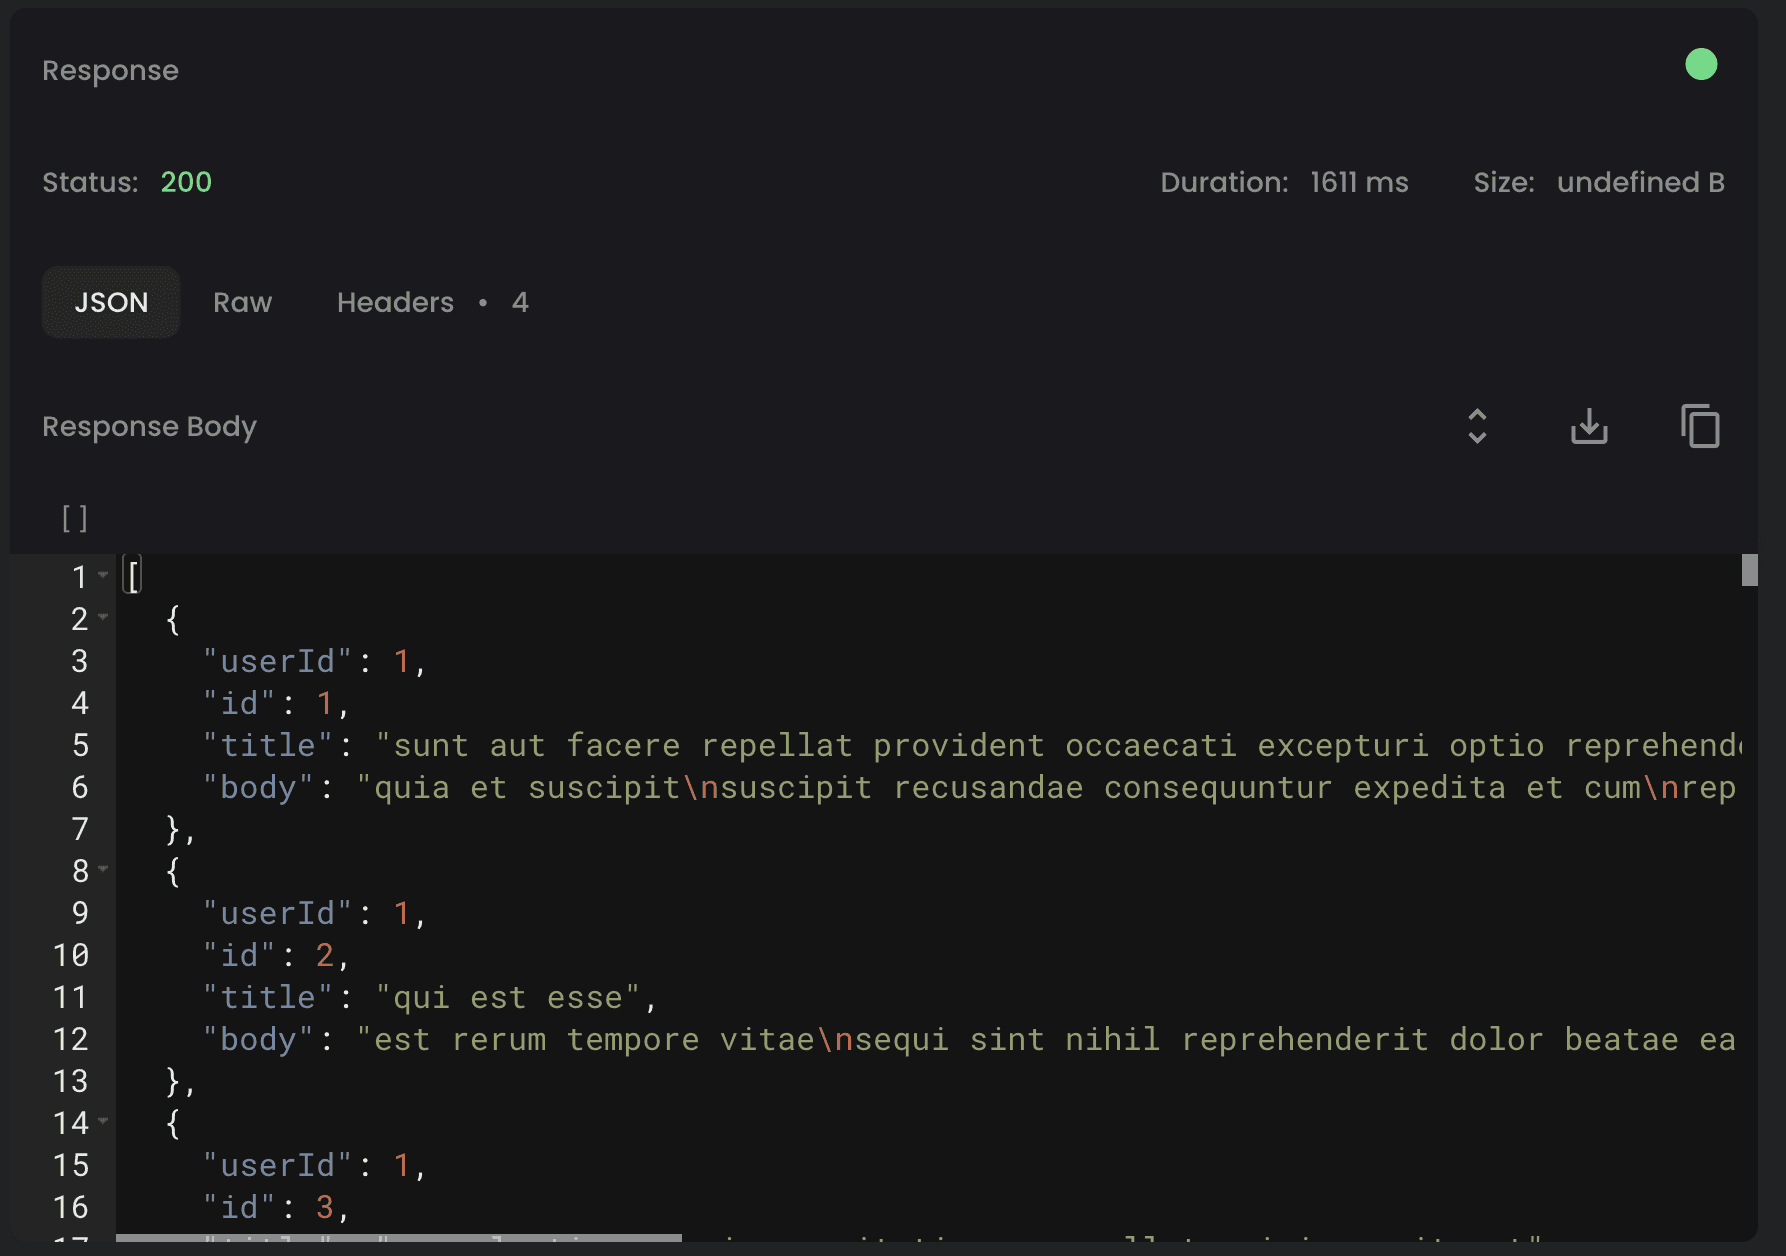
As GET requests do not change the state of the resource, these are said to be safe methods. Additionally, GET APIs should be idempotent, which means that making multiple identical requests must produce the same result every time until another API (POST or PUT) has changed the state of the resource on the server.
POST Method
POST is used to send data to a server to create/update a resource. The data sent to the server with POST is stored in the request body of the HTTP request. Use POST method to create new subordinate resources.
When creating a POST request with Hoppscotch, you place the data being sent in the Request body as shown below.
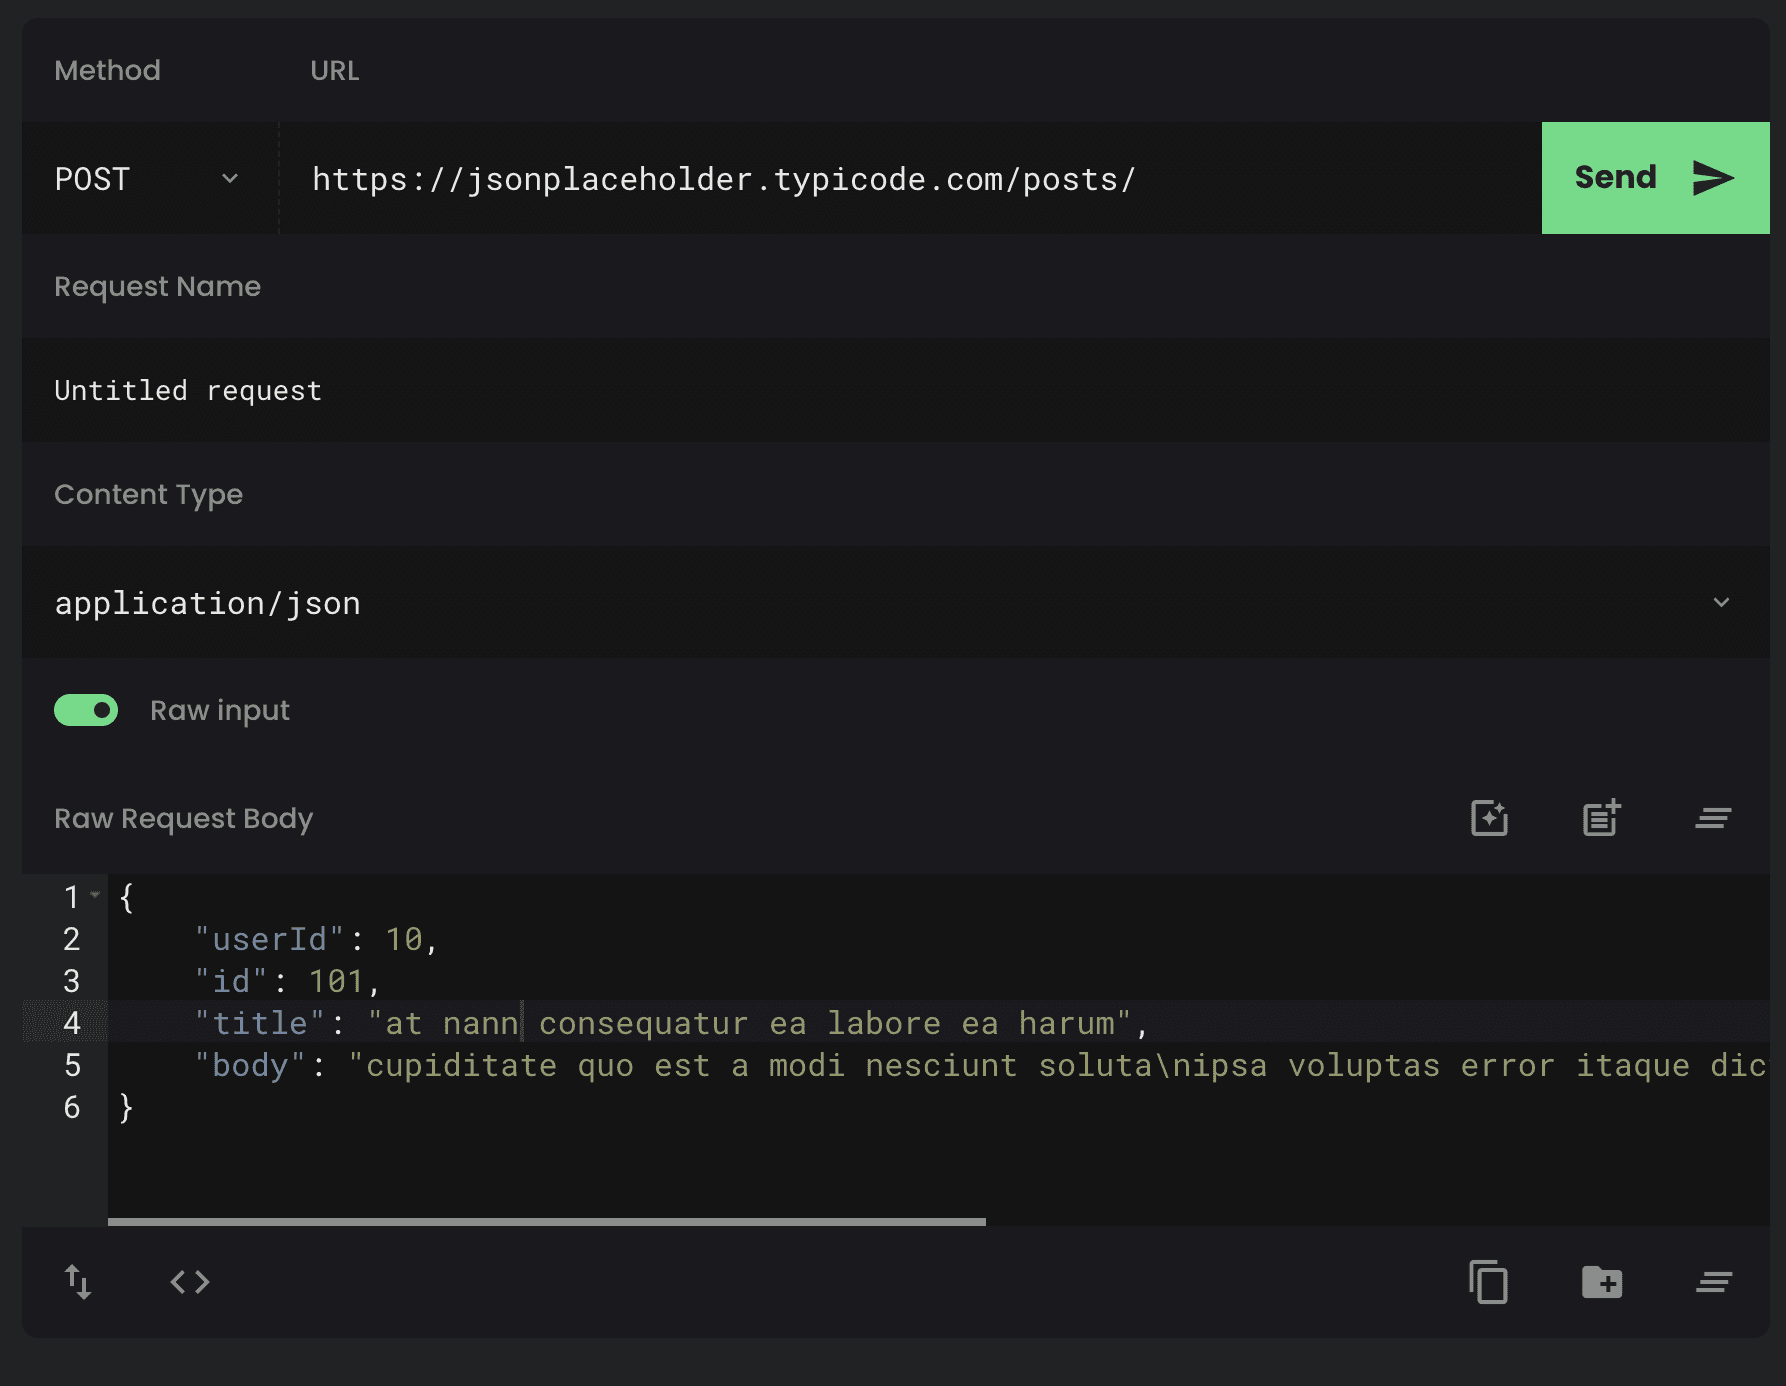
For instance, a file is subordinate to a directory containing it or a row is subordinate to a database table. When talking strictly in terms of REST, POST methods are used to create a new resource into the collection of resources.
PUT Method
A PUT request creates a new resource or replaces a representation of the target resource with the request payload. The use case for POST and PUT methods often clash. I suggest that POST requests be made on resource collections, whereas PUT requests be made on a single resource.
If we want to update our first post in our collection which has an id of “1”. We would have to do the following
Change the method to PUT via the methods dropdown.
Change the url to point to the post of interest.
Add the new data in the response body

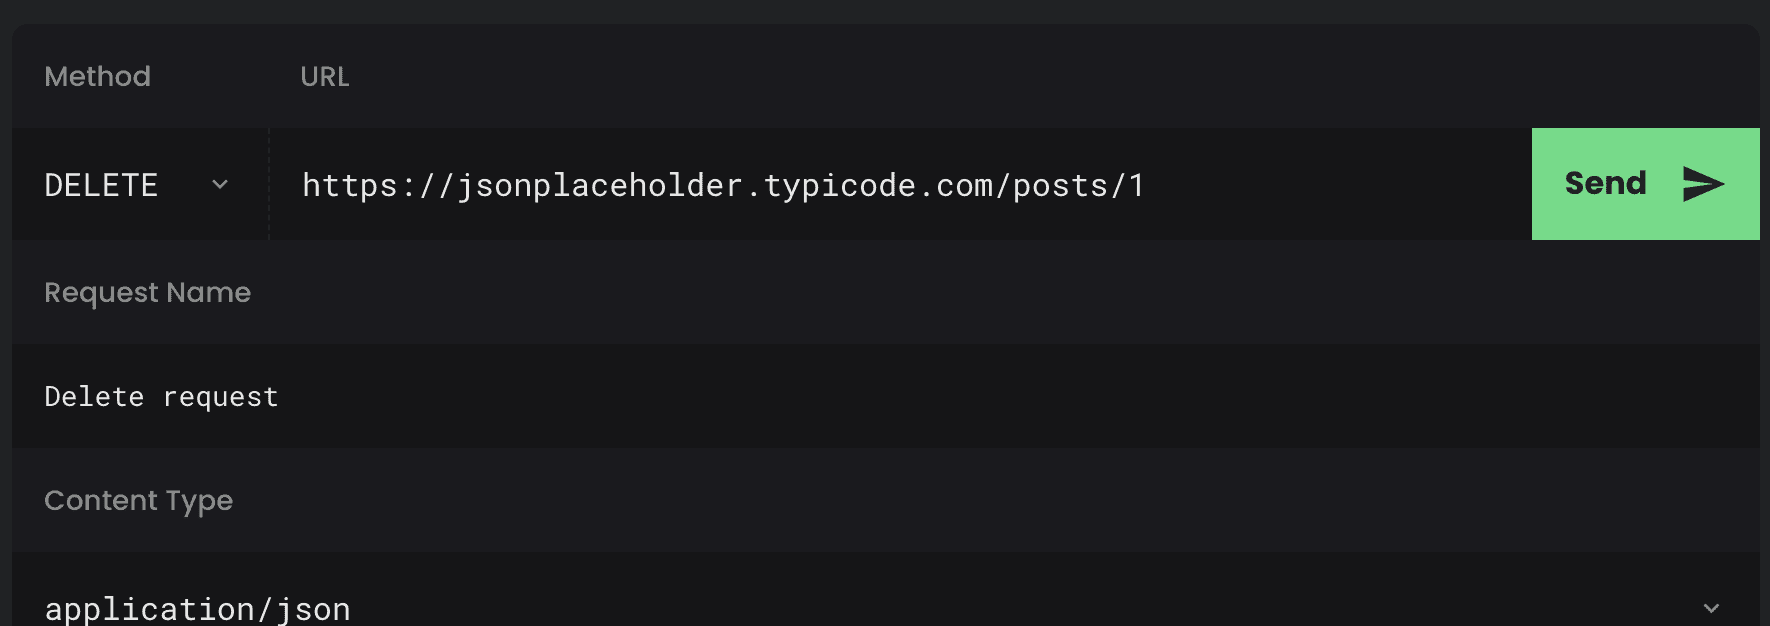
DELETE Method
As the name applies, DELETE requests are used to delete resources. If you DELETE a resource, it’s removed from the collection of resources. Similar to POST method, specify the endpoint you wish to delete as shown below.
Repeatedly calling DELETE API on that resource will not change the outcome – however, calling DELETE on a resource a second time will return a 404 (NOT FOUND) since it was already removed.
If a DELETE method is successfully applied, there are several response status codes possible:
A 202 (
Accepted) status code if the action will likely succeed but has not yet been enacted.A 204 (
No Content) status code if the action has been enacted and no further information is to be supplied.A 200 (
OK) status code if the action has been enacted and the response message includes a representation describing the status.
That’s it folks, make sure to share this post if you found it helpful.


